Local WordPress development: harness the power of Docker containers
Introduction
Do you develop Wordpress sites locally? Then you may know annoying tasks like - create virtual host, solve PHP version, solve virtual host routing to folder, errors related to starting local PHP server like xamp, apache and so on. If you switch to docker then part of these worries will disappear and you can change PHP version by rewriting one number, read on to learn more.

Docker 🐋
Allows you to encapsulate WordPress and its development environment, including the web server, database, and other dependencies, into so-called containers. These containers are isolated and run on any device that supports Docker, regardless of operating system. This minimizes the risk of version conflicts and makes the development environment easily portable and shareable between team members.
I would divide the use of the docker into two basic ones.
Docker for local development - in this case we use docker as a development environment to which we attach a shared folder with the project and the container has the ability to work with our project files. We have the ability to easily add the containers and technologies we need for development.
Docker for deploy - this is deploying our application using the container, to production servers. Usually we use the same or slightly modified containers from development, so we have a very good chance that our application will behave identically to how it did during development.
In this article, we will discuss the use of docker for local development of Wordpress CMS.
Wordpress
To make the introduction complete, it is necessary to explain what Wordpress is, although I assume that the reader of this article who decides to dockerize Wordpress has already met it. WordPress is an open-source content management system (CMS). It is a web platform that allows users to easily create and manage websites and blogs without the need for extensive programming knowledge. WordPress offers an intuitive user interface, a rich menu of templates and plugins, allowing for quick and easy customization and extension of site features. It's widely adopted for its simplicity and modularity thanks to the aforementioned plugins, wide variety of templates and so on.
Pre-requisites
In order to run anything on docker we need a docker client. For local development, I recommend Docker Desktop application, which uses a nice UI to show the current state of our containers, allows us to delete images, volumes and much more.
Next, we'll need a text editor (I recommend Visual Studio Code) and a folder where we'll create the project.
TIP: If you want to skip the manual file creation and download the project directly, you can do so in this repository: github.com/standahorvath/Wordpress-Docker
Let's get started
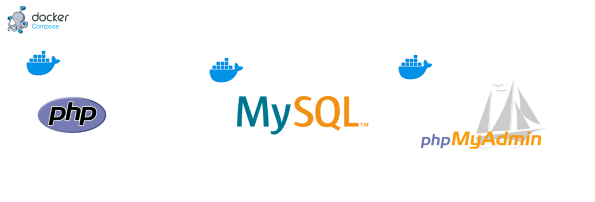
To develop comfortably on wordpress we need the following:
- PHP server (in our case apache)
- MySQL database
- PhpMyAdmin (for database management)
Our task will be to make containers out of these three services and run Wordpress on them.
Dockerfile
A Dockerfile is a text file containing instructions and commands for creating a custom Docker container. This file defines how the container should be built, which includes the base image, installing the necessary software packages, copying files into the container, setting up the environment, and other configurations.
Our Dockerfile will be based on the php:8.2-apache image, which is a Linux image running apache with PHP version 8.2. At the same time, we know that we want to mount the web application (in our case Wordpress) to the /var/www/html folder inside the container.
Note: If we wanted to replace the PHP version with another one, we just need to change the image tag that the Dockerfile is based on. List all the tags for php here: hub.docker.com/_/php/tags
We will place the Dockerfile in the docker/dev/Dockerfile folder in our project and it will look like this:
## The base image we are starting from
FROM php:8.2-apache

# Setting up the working directory
WORKDIR /var/www/html

# Installing dependencies
RUN apt-get update && apt-get install -y \
    curl \
    git \
    zlib1g-dev \
    libicu-dev \
    g++ \
    libpng-dev \
    libwebp-dev \
    libfreetype6-dev \
    libjpeg62-turbo-dev \
    libmcrypt-dev \
    libzip-dev

# Installing PHP extensions
RUN docker-php-ext-configure gd --with-webp --with-freetype --with-jpeg \
    && docker-php-ext-configure zip \
    && docker-php-ext-install gd intl zip mysqli pdo pdo_mysql

# Set rights for the project folder
RUN chown -R www-data:www-data /var/www/html

# Install composer if we would like to use it
RUN curl -sSL https://getcomposer.org/installer | php -- --install-dir=/usr/local/bin --filename=composer

# Enable mod_rewrite for apache
RUN a2enmod rewrite

# Exposing port 80
EXPOSE 80

# Start apache server
CMD ["apache2-foreground"]
docker-compose.yml
This is a text file in YAML format that tells **how to start which containers, on which port to run, where to get Images for them, which folders to mount, and so on.
Our docker-compose.yml will look like this:
version: '3'
services:
  # PHP server
  php:
    # container name (WP-App)
    container_name: WP-App
    build:
      # Path to Dockerfile in our project
      dockerfile: docker/dev/Dockerfile
    volumes:
      # Mount the project folder to /var/www/html/ inside the container
      - ./:/var/www/html/
    ports:
      # Exposing port 80 to port 80 on our system
      - 80:80
    depends_on:
      # Depend on the database container, wait for it to start
      - database
    links:
      # Link database container to php container
      - database

  database:
    # Container name (WP-Database)
    container_name: WP-Database
    # Image used
    platform: linux/x86_64
    image: mysql:5.7
    ports:
      - 3306:3306
    # User, password and database settings from .env file
    env_file:
      - docker/dev/.env

  phpmyadmin:
    # Container name (WP-PhpMyAdmin)
    container_name: WP-PhpMyAdmin
    # Again, dependency on the database container
    depends_on:
      - database
    # The image used
    image: phpmyadmin/phpmyadmin
    # Exposing port 80 to port 8282 of our system i.e. localhost:8282
    ports:
      - '8282:80'
    # Setting up the user, password and database from the .env file
    env_file:
      - docker/dev/.env
    # Set the upload limit to 300M if we would like to import .sql
    environment:
      UPLOAD_LIMIT: 300M
The configuration consists of a total of three containers.
- Note that we attach our project folder to the
/var/www/html/folder inside the php container, which is the PHP server container. - Our PHP server will be running on port
80, which means we will see server output athttp://localhost - The database and phpmyadmin containers share the same
envfile, which guarantees that they will have the same user configuration, passwords, etc. - The PHPMyAdmin container runs on port
8282and therefore we will be able to visit it athttp://localhost:8282
At this point we are missing the .env (dot env) file to complete the docker configuration, we will create it in the docker/dev/.env folder with the following contents:
PHP_ENABLE_XDEBUG=0
MYSQL_HOST=database
MYSQL_PORT=3306
MYSQL_DATABASE=wordpress
MYSQL_USER=wp
MYSQL_PASSWORD=wp
MYSQL_ROOT_PASSWORD=wp
PMA_HOST=database
If we have done everything correctly and we have enabled the Docker client (Docker Desktop) then we can run the whole project using the command inside the project folder:
docker-compose up -d
This should get our docker containers start up.

However the PHP server does not have index.php, we do not have Wordpress downloaded in the project.

In this case, just download Wordpress from the official site and copy it to the root folder of our project.
After visiting http://localhost we should see the Wordpress installation.
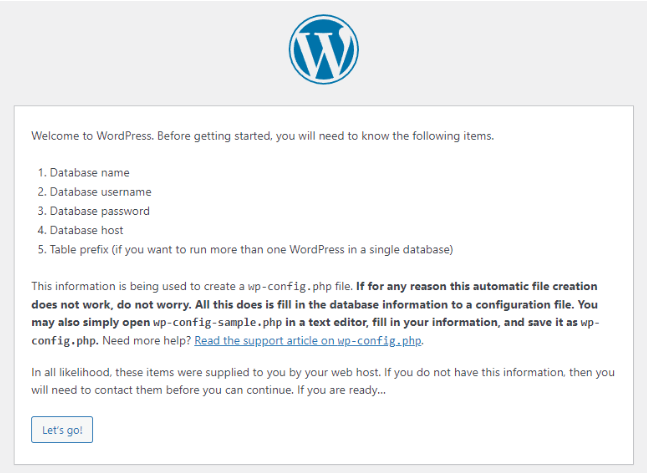
Where in the next step we should fill in the database data as follows:
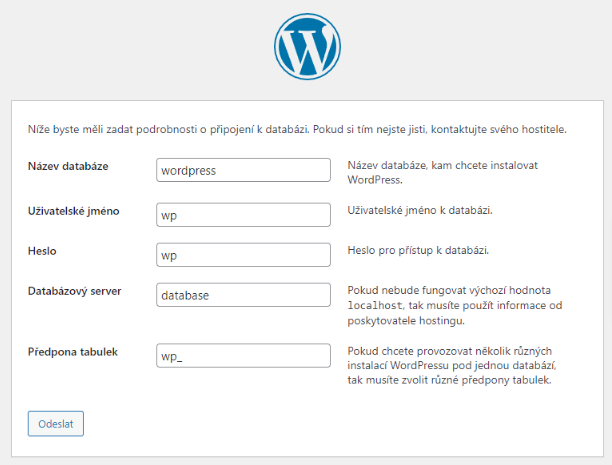
Then we continue with the installation as we are used to.
A couple of commands that will come in handy
# Starting the project
docker-compose up -d
# Stop containers and delete all data
# Containers, Images, Volumes, Networks
docker-compose down
# Recompile dockerfile
docker-compose build
For a full description of the docker-compose command, see docs.docker.com/engine/reference/commandline/compose/
Benefits
- Easy to change PHP version
- If you are working in a team, your collaborator will install the development environment with a single command (assuming they have docker installed)
- If you should deploy also via docker so you have consistent development with the distribution
- If you are developing more than one project, you will appreciate the isolated environment and the ability to quickly start another project
Disadvantages
- Docker is demanding on your HW resources machines, especially if you don't have linux
- There can be other problems associated with docker (bad ports, bad paths, etc.)
Conclusion
We have explained the advantages of a development environment using docker containers. We have shown the basic building blocks of docker configuration and how to prepare it for Wordpress. We told how to install Wordpress and what advantages and disadvantages this solution comes with. I hope you found this article helpful and will try containerizing your Wordpress development environment.
